Showing posts with label Fussy Cutting. Show all posts

Saturday, October 26, 2019

Love, In The Shape of a Card!

As mentioned in my last post, I have received a few cards from fellow demonstrators lately & am loving that I can share them with you.

World Card Making Day was a couple of weeks ago & my mates were busy indeed!!

Have a look at their creations!


 Jenny & I have known each other for many years & cross paths at various SU! events, so to receive a card from her is pretty special!

Her message of support may have made me smile & tear up all at the same time!!

Here, Jenny has used the stamp set, Charming Cafe with Berry Burst with matching ribbon & markers with Softly Falling embossing folder (R).

How bright & cheery is it?
Using Crafting Forever, Sue fussy cut the scissors image & popped it onto Dimensionals, so that it matched the sentiment. It is just perfect with Follow Your Art DSP, isnt it!!

I look forward to finding her among 600 other fellow demos when we attend OnStage 2019 in Sydney in November!

Mel caught me on an emotionally flat day, so this ray of sunshine absolutely turned me around!! He message was beautiful...

She has used Everything Amazing, a stamp set that didn't do anything for me, but now it does!!

Sometimes you have to set it in 'real life', as they say, to appreciate it, hey?

Thanks for staying close to see these cards, Im so happy to have shared them with you!!


Happy stamping! Jo.


Saturday, September 14, 2019

Where The Wild Things Are...


I was at a team meeting last week & the theme for creations was Halloween. 
I literally didn't get that memo so I turned up un-prepared, oops!!

But I am very blessed to have a wonderful group of women who share their ideas, stamp sets & cardstock with me, so I was able to come away with these examples!!

Colouring them with the Stampin' Blends was therapeutic too!! I do like to colour and then fussy cut!

Im just not sure of what to make with them, so they are sitting on the desk, watching all that I do at the moment, lol!!

As soon as I saw this little guy, he reminded me of a childhood story: Where The Wild Things Are. It's a story that still stands today & I read it to the children that I work with, during the week!
So as I mentioned, I have no idea what will become of these little creatures, but I will certainly show them off when I do!!

Thanks for looking!

Jo.


Stamps:  Spooktacular Bash, Boo To You.
Cardstock:  Whisper White,  Momento Black.

Ink: Stampin' Blends:Rich Razzleberry (Light & Dark), Old Olive (Light & Dark), Daffodil Delight (Light & Darlk), Bermuda Bay (light & Dark), Pineapple Punch (Dark) & Color Lifter.
Big Shot items: Ornate Dies
Punches: Detailed Trio.
Accessories:  Coffin Treat Boxes, Stampin' Dimensionals, , Paper Snips, Tear n Tape adhesive, Stampin' blocks.

Sunday, August 25, 2019

Holiday Catalogue - Sneak Peak Blog Hop

Image may contain: text


Wow!! The year is moving so quickly & it wasn't until I signed up to this Blog Hop that I realised how neglected my Blog is...eeeek!!

So I'm super glad to be here & working on it & finding some inspiration from others.

ESAD is such a wealth of knowledge relating to SU!, as well as giggles, support & inspiration, (as mentioned above!). It is my go-to for SU! questions & beyond!!

Image may contain: text

That being said, let's get to why we are here: this Blog Hop!!
I've decided to work on a couple of cards that show-case items & techniques for the Beginner stamper, but it would also work for the time poor & those who may not have many supplies, for many reasons.

There is something organic & magical about blowing the seeds of a dandelion & watching them float away - I still do it, ad an adult & when I watch them drift away with the breeze, the world stops its ugliness, just for a minute... *sigh*

I've used the Hammered Metal 3D embossing folder, Sweet Silhouettes dies and NO STAMPING as such, only some dragging of the Soft Suede cardstock across the ink pad to give the 'dirt' some texture.

Using the negative part of the dandelion for the wispy parts floating away, it gave my card the sense of movement...& adding a bit of bling, is always necessary, right?


I've cared for turtles for many years & this little stamp image made me smile!!
I cased the first card & then made the second card to give to a turtle professional who helped me when my current little friend was ill. 
In this example, the Hammered Metal embossing folder looks exactly like a turtle's shell, so this card didn't need much else to dress it up.


Did you notice the difference between which way I've used the embossed cardstock?

When I stamped the turtle again, for the inside of the card, I used a baby wipe to wipe away his sadness & used the Basic Black marker to lift his smile the right way!!

During my preparing for this Blog Hop, my order wasn't going to arrive in time, so I raced to my fellow demo's house, Alison & she had purchased the Memories of Home stamp set. While I love the tree & its details, I wanted to team it up with something else, so that it didn't take up the whole card. 

The Dashing Deer stamp looks gorgeous on Cherry Cobbler & then clear embossed, (just like the snow falling, behind the tree).

Adding a simple Red Rhinestone to make this deer the very popular Rudolph, was a given!!

I decided to step up my stamping for the next card. It could encourage the Beginner or Casual stamper to learn new techniques.

 Using our Difference Maker stamp set, Nature's Beauty, (when you purchase this set, a portion of the money is given to various charities), I coloured the gentle doe with our Watercolour Pencils, ran the Crumb Cake ink pad over the Woodlands embossing folder before putting it through the Big Shot. 

I teamed these items with Sweet Silhouettes & Stitched Rectangle Dies with the gorgeous Wink of Stella for a little touch of shimmer.

I do love the dimension that the leaves give & her soft face peeking through the branches! I used this as a swap that I participated in also but I just had to share it with you also!!

Well considering I only had 2 of the items & a stamped image from the incredible Holiday Catalogue, (available from 4 Sep to 2 Jan), I'm pretty happy with how they can be added to various items from the Annual Catalogue.
Increasing the use of each item means that they are more affordable, gets the creative juices flowing & therefore makes even more creations, obviously!!

Thanks for looking at my cards, I's love to hear which product grabbed your attention...& don't forget to subscribe so you don't miss any of my posts.

Happy hopping to the next Blog! Cheryl's work is gorgeous!!

https://chezzakayewandellagal.blogspot.com/2019/08/esad-2019-holiday-catalogue-sneak-peek.html

Blog hop participant list:
13. Jo Weedon              (This is me :)
24. Jackie Aitken
25. Lauren Meiklejohn

Card #1:
Cardstock: Daffodil Delight, Old Olive, Basic Black, Soft Suede
Ink: Soft Suede.
Big Shot items: Hammered Metal Embossing Folder, Sweet Silhouette dies.


Accessories:  Red Rhinestones, Fine Tip Glue, Tear n Tape adhesive, Stampin' blocks.

Card #2:
Cardstock: Mossy Meadow, Crumb Cake, Very Vanilla.
Ink: Momento, Mossy Meadow & Old Olive markers.
Big Shot items: Hammered Metal Embossing Folder, Little Alphabet.
Accessories:  Googly eyes, Fine Tip Glue, Tear n Tape adhesive, Stampin' blocks, baby wipes.

Card #3:
Cardstock: Cherry Cobbler, Crumb Cake, Old Olive
Ink: Crumb Cake, Versamark.
Big Shot items: Dashing Deer dies.
Accessories:  Clear Embossing Powder, Embossing Buddy, Embossing Tray & Brush, Fine Tip Glue, Tear n Tape adhesive, Stampin' blocks.

Card #4:
Cardstock: Mossy Meadow, Early Espresso, Crumb Cake, Very Vanilla.
Ink: Soft Suede, Mometo Black, Mossy Meadow.
Big Shot items: Stitched Rectangle dies, Sweet Silhouettes dies, Woodlands Embossing Folder
Accessories:  Paper Snips, Watercolor Pencils, Fine Tip Glue, Tear n Tape adhesive, Stampin' blocks.


Friday, December 15, 2017

Challenge... 1, 2 & 3...

I don't often take part in challenges, (although they are a great way to get the creative juices flowing!), but I saw one on the Stampin' Up! demonstrator web-site a couple of weeks ago.
(One of the many perks of sighing up to be a Stampin' Up! Demonstrator)

And I decided to commit to it!!

This challenge is what I would call a "3,2,1" challenge.
I needed to make 3 x cards, 2 x 3D items & a scrap page of any sort - my mind immediately exploded...suffered a little...and then, slowly but surely, I began to have ideas forming in my head!!

And I was off....

3 Cards:

While I was attending OnStage 2017 in November, I was lucky enough to receive this stamp set: Bird Banter. So I teamed up Bella the puppy, (from Bella & Friends), for this fun card. Using the masking technique & a couple of Blends, I was able to give Bella a lift to see her friends!!
I then stamped Bella a couple of times so that I could fussy-cut her little limbs, to add a bit more dimension to her

My second card saw me using the Get Well Soup, but I changed it by using the masking technique again. This time I removed the Get Well Soon sentiments & added the So Very Much, so that it seems to be apart of the warm bowl of soup....
Im loving the Blends, can't you tell already :)
They make colouring in an image so quick and easy, I just love the shadowing effect of them!

To finish this card, I dusted off my container of Silver Embossing Powder, the spoon was screaming to be that colour, right??


Here's an insight into my childhood: I was always around the kitchen, trying Mum's cooking & especially available when the spoon needed to be licked after a batch of biscuits or a cake was happening!!
So making my third card made me think of mum & all the skills she taught us, in life in general, but especially in the kitchen.
I particularly loved how the mixer is relative to the size of the bowl, so of course they had to be together!! This DSP is Domestic Godess & just reminds me of a table cloth!!

I think would make a great card for someone's partner or even a close friend...


2 3D items:

For those of you who have been visiting my blog, you may have noticed that I JUST LOVE 3D ITEMS!!

I had been talking with a close friend about the wooden type kits I have that I just havent had the time to put together somehow...and then this challenge jumped at me!!

So, given that it was only a month or so away from Christmas, (back then...), I decided to find one of wreaths I had been meaning to work on and actually do it!!

Ive used a current & gorgeous DSP called Christmas Around The World (Candy Cane paper in this image) & a retired DSP called Be of Good Cheer. Ive now got this hanging on the front door at the Child Care Centre that I work at...
 Using the Glimmer Paper from a previous kit, I used the mini Dimensionals to give them some height. I strung a peice of Window Sheet across from one side of wreath to the other & hunted out the Alphabet dies for Merry Christmas, also.
 And can you see my holly? These wooden circles, initially, were sponged with Cherry Cobbler and then left to dry overnight with a big blob of wet adhesive from my Fine Tip Glue Pen - dont you love the effect??
 To keep up with the 3D Christmas theme, I was asked to make boxes for 2 of these Glitter Baubles, by a customer. What struck me was how similar the colours of the bauble & our stunning Glimmer Paper is - just beautiful!
 I have made boxes for the customer previously, so I knew that she wanted to fill the bauble with the children's name of the finishing year & present this to each of her children's teacher.

I started with the first box here & was feeling pretty chuffed with myself & then maybe either got a bit tired or a little lazy, causing me to get glue on the front of the box...

As we know, this is simply an opportunity for embellishing, right? So then I made a 'belly' type band to go around the lid of the box, punched a bow & ta-day, I've saved the box!!

2 different boxes for 2 different teachers!!

When each teacher opened their gift, the lid picked up the bauble, presenting her with everyone's name over the year.
During the time that I was making these boxes, I was also going to work during the day. The children in the centre that I work at, thought I was very Chrismassy with the amount of sparkle I had all over me, it just added to the festiveness!!

1 Scrap Page...

Before I was a card or 3D item maker, I was a scrapbooker!! I must admit that I havent spent a lot of time recently 'scrappin' at all, so it was lovely to be 'forced' to create a page!!

My 16 year old daughter, Rachelle recently completed her Year 10 year & they celebrated by having a formal. Rach was originally not going to go, deeming it 'too over the top' &being a basketball couch & player, she didnt think it would be something she would enjoy.

Roll on a couple of weeks & her friends talked her into wanting to go - and boy are we all glad she did!! She had a great leadup with shopping for 'the dress', shoes & a little bit of make-up & was blessed with a couple of her friends helping her to prepare on the day...

 Rachelle's dress was a 'nude' colour, so this posed a bit of a colour challenge for me, so I decided to go with 'Blushing Bride' - working the any type of pink is hard for me, but I think it works!!

The latest craze in the Stampin' world is this 'Eclipse' technique, so after stamping Versamark & heating the white Embossing Powder, I used my Big Shot to spell out the heading, (& an additional 3 layers of each letter, *gasp*) & then adhered them together.
 The Bloomin' Love set lent itself nicely to lace on Rachelle's dress, Im so pleased with how it all came together! And combining this with the dies, sponging it slighty & adding a splash of class with our Pearls, it finished off the page!


This had certainly been a long post of many creations & I thank you for sticking with me!!

Im incredibly grateful to be able to be able to make various items that I can share with loved ones & possibly even inspire someone else to get creative too!!

Im super glad that I followed through with achieving this challenge - I may even go looking for another 3, 2, 1 Challenge, perhaps?

I'd love for you to leave a comment on any of the projects that you like...

See you next time :)

Wednesday, May 31, 2017

Happy 5th Birthday Kelly!!

Like any work-place, an acknowledgment of another year of work is always great to have recognised... This is no different for us, friends of Kelly, who is celebrating her 5th year of being a Stampin' Up! demonstrator.

Kelly's commitment to the company, her friendship and of course, the work she creates, is always amazing!!

With that in mind, I have pulled out my laptop, dusted off my sleepy blog & have finally given it some love & care.. there are soooo many reasons to be happy right now, hey?

Some of you may know that there is a new annual catalogue that is being released to the public on June 1 this year & I have chosen to show off one of the stamp sets from this catalogue. (One of the perks to being a SU! demonstrator is that you are lucky enough to have access to pre-released items!!)
So here we go, time to show you my 'Happy' creations...

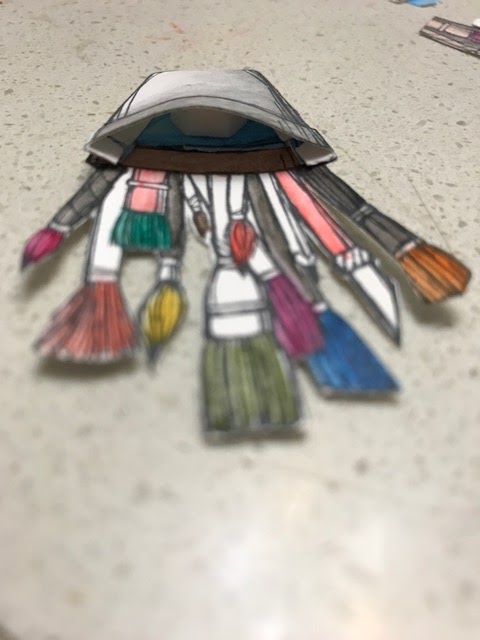
This photo shows a couple of the images from Crafting Forever, a brand new stamp set!! I think it has soooo many opportunities to be played with, so I seriously stamped over 40 images & lost myself to colouring them in, using the Watercolor Pencils with an Aquapen. How could you get any colours wrong, really???

While I was cutting out the paint pots, I realised that I could 'build' a container of brushes by individually cutting them out and layering them, (lucky my children are 12+ and they can cook their own tea, right??)

I decided my paint pots would work really well to hold up the 'easel' part of the an Easel Card. I used acetate, (over-head projector sheets, for us smarter people) behind the paint pots and placed them between the layers of the sentiment band.

The sentiment says: Do something creative every day... Isn't that just a great message to send someone?

I then cut a frame to place over the butterfly, from Butterfly Wings & hung it like a piece of artwork!!

These cards are now travelling all over Australia, as a part of a Demonstrator Swap - I make 10 cards of the same design, they go to a designated person who sorts through all of the swaps & she will send me 10 new swaps, of all different designs - what a great way to be inspired, hey?


How bright and cheerful are they? Perfect timing for Kelly's celebratory party, I think!!
Congratulations Kelly on making a great choice 5 years ago, (I'm celebrating 8 years Sunday, just gone!!) Hip hip hooray to us both!!

http://www.melissagifford.com.au/2017/05/kellys-stamping-friends-blog-hop.html


I'd love to hear what you think about my creations, I'd love for you to leave me a message that you've visited, if you can...

From this blog, you will click onto Danielle's blog, her creations will astound you!!

Take it away Daniella... Thanks for stopping by :)


Sunday, August 14, 2016

Just a Small Thanks...

A few weeks ago, I took over 100 slides to my local Harvey Norman store. I wanted the images copied, along with copying original wedding photos of my Mother & Father In Law's Wedding.

I'm sure you can understand, I was slightly nervous handing over such an important part of my husband's life... But when I met Mat, at the photo lab, I knew I could trust him.

Not only did Mat take great care of the slides, but he also had them finished in about 2 hours!!

I barely had time to finish this little box before he called to say they were done!!

I just love when I get things right and all the lines actually line up!!

The aeroplane from       reminded me of the age of some of the slides that had been copied, so I thought it was just perfect for this project! The 'tree' from the      punch made for a wonderful little cloud!!  With a couple of Dimensionals  on the lid, I threw in a few Favourites Chocolates & I was out the door to collect my slides & USB with a small gift for Mat.