Showing posts with label Alphabet Letters. Show all posts

Friday, April 26, 2019

Rachelle's 18th has kept me busy!!

In the middle of April, my husband & I celebrated our daughter's 18th birthday with her, family and friends.

There was such a lead up to it & even so, Im so glad that we had planned her party in the middle weekend of school holidays, it gave me even more time to get things done!! As it turned out, I was quite sick with a chest infection, so that week of no work allowed me to get things done in between coughing bouts & the occasional Nanna nap in the arvos helped to get me to the finishing line!!

These are the invites that I made Rachelle to send out a while ago, her choice of colours - aren't they great? Bermuda Bay & Whisper White with a flash of silver & bling are stunning together!!

So with the invites sent out, I began to work on some of the decorations for the tables. We had hired a hall & was having a catering company coming in with roast meats, vegies & bread rolls, so I didnt need to worry about that, yippee!!

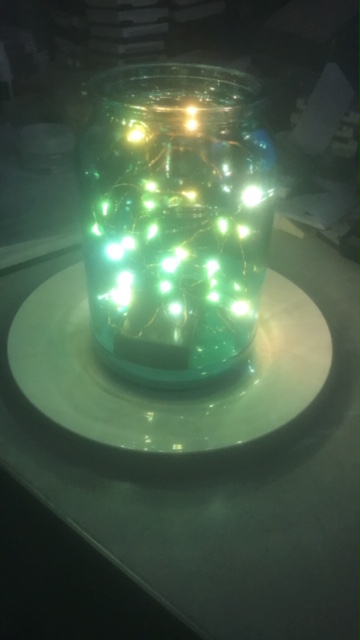
I decorated the largest of the Maccona jars & used battery operated lights, to give off a soft look in the middle of each table - there were 16 or so to decorate!!

Did you know that you can remove the inner part of the lid & decorate that too? Luckily I did, because they finished the jars off!

And they turned out great!! The Bermuda Bay cardstock for the 18 & R was embossed with silver embossing powder while the Whisper White cardstock was sponged with Bermuda Bay & then placed onto the larger BB circle.
One of my younger sisters made Rachelle's cake, & it was the highlight of the dessert table!! The pop of purple looked amazing & the taste was fantastic!! Thanks Brooke!

The night went by so fast, that we didn't get many photos, (although there may be more when the disposable cameras are processed!!), but Rach had a great night with her family & friends!! The jelly shots cannot be mentioned for a while though!! LOL!!

We have 20 moths until our next 18th birthday party, lets see what Kyle's colour scheme etc will be, hey?

Tune in next week to see how I decorated the Maccona jars, they really are super simple & can be re-used again & again!!

Thanks for reading,

Jo


Friday, December 15, 2017

Challenge... 1, 2 & 3...

I don't often take part in challenges, (although they are a great way to get the creative juices flowing!), but I saw one on the Stampin' Up! demonstrator web-site a couple of weeks ago.
(One of the many perks of sighing up to be a Stampin' Up! Demonstrator)

And I decided to commit to it!!

This challenge is what I would call a "3,2,1" challenge.
I needed to make 3 x cards, 2 x 3D items & a scrap page of any sort - my mind immediately exploded...suffered a little...and then, slowly but surely, I began to have ideas forming in my head!!

And I was off....

3 Cards:

While I was attending OnStage 2017 in November, I was lucky enough to receive this stamp set: Bird Banter. So I teamed up Bella the puppy, (from Bella & Friends), for this fun card. Using the masking technique & a couple of Blends, I was able to give Bella a lift to see her friends!!
I then stamped Bella a couple of times so that I could fussy-cut her little limbs, to add a bit more dimension to her

My second card saw me using the Get Well Soup, but I changed it by using the masking technique again. This time I removed the Get Well Soon sentiments & added the So Very Much, so that it seems to be apart of the warm bowl of soup....
Im loving the Blends, can't you tell already :)
They make colouring in an image so quick and easy, I just love the shadowing effect of them!

To finish this card, I dusted off my container of Silver Embossing Powder, the spoon was screaming to be that colour, right??


Here's an insight into my childhood: I was always around the kitchen, trying Mum's cooking & especially available when the spoon needed to be licked after a batch of biscuits or a cake was happening!!
So making my third card made me think of mum & all the skills she taught us, in life in general, but especially in the kitchen.
I particularly loved how the mixer is relative to the size of the bowl, so of course they had to be together!! This DSP is Domestic Godess & just reminds me of a table cloth!!

I think would make a great card for someone's partner or even a close friend...


2 3D items:

For those of you who have been visiting my blog, you may have noticed that I JUST LOVE 3D ITEMS!!

I had been talking with a close friend about the wooden type kits I have that I just havent had the time to put together somehow...and then this challenge jumped at me!!

So, given that it was only a month or so away from Christmas, (back then...), I decided to find one of wreaths I had been meaning to work on and actually do it!!

Ive used a current & gorgeous DSP called Christmas Around The World (Candy Cane paper in this image) & a retired DSP called Be of Good Cheer. Ive now got this hanging on the front door at the Child Care Centre that I work at...
 Using the Glimmer Paper from a previous kit, I used the mini Dimensionals to give them some height. I strung a peice of Window Sheet across from one side of wreath to the other & hunted out the Alphabet dies for Merry Christmas, also.
 And can you see my holly? These wooden circles, initially, were sponged with Cherry Cobbler and then left to dry overnight with a big blob of wet adhesive from my Fine Tip Glue Pen - dont you love the effect??
 To keep up with the 3D Christmas theme, I was asked to make boxes for 2 of these Glitter Baubles, by a customer. What struck me was how similar the colours of the bauble & our stunning Glimmer Paper is - just beautiful!
 I have made boxes for the customer previously, so I knew that she wanted to fill the bauble with the children's name of the finishing year & present this to each of her children's teacher.

I started with the first box here & was feeling pretty chuffed with myself & then maybe either got a bit tired or a little lazy, causing me to get glue on the front of the box...

As we know, this is simply an opportunity for embellishing, right? So then I made a 'belly' type band to go around the lid of the box, punched a bow & ta-day, I've saved the box!!

2 different boxes for 2 different teachers!!

When each teacher opened their gift, the lid picked up the bauble, presenting her with everyone's name over the year.
During the time that I was making these boxes, I was also going to work during the day. The children in the centre that I work at, thought I was very Chrismassy with the amount of sparkle I had all over me, it just added to the festiveness!!

1 Scrap Page...

Before I was a card or 3D item maker, I was a scrapbooker!! I must admit that I havent spent a lot of time recently 'scrappin' at all, so it was lovely to be 'forced' to create a page!!

My 16 year old daughter, Rachelle recently completed her Year 10 year & they celebrated by having a formal. Rach was originally not going to go, deeming it 'too over the top' &being a basketball couch & player, she didnt think it would be something she would enjoy.

Roll on a couple of weeks & her friends talked her into wanting to go - and boy are we all glad she did!! She had a great leadup with shopping for 'the dress', shoes & a little bit of make-up & was blessed with a couple of her friends helping her to prepare on the day...

 Rachelle's dress was a 'nude' colour, so this posed a bit of a colour challenge for me, so I decided to go with 'Blushing Bride' - working the any type of pink is hard for me, but I think it works!!

The latest craze in the Stampin' world is this 'Eclipse' technique, so after stamping Versamark & heating the white Embossing Powder, I used my Big Shot to spell out the heading, (& an additional 3 layers of each letter, *gasp*) & then adhered them together.
 The Bloomin' Love set lent itself nicely to lace on Rachelle's dress, Im so pleased with how it all came together! And combining this with the dies, sponging it slighty & adding a splash of class with our Pearls, it finished off the page!


This had certainly been a long post of many creations & I thank you for sticking with me!!

Im incredibly grateful to be able to be able to make various items that I can share with loved ones & possibly even inspire someone else to get creative too!!

Im super glad that I followed through with achieving this challenge - I may even go looking for another 3, 2, 1 Challenge, perhaps?

I'd love for you to leave a comment on any of the projects that you like...

See you next time :)

Thursday, August 11, 2016

Welcome Luke Alexander.

I have a close friend, who recently asked me to make her a Keepsake Box for her baby, Luke.

Luke is a Rainbow Baby, to his sister, Violet, born August 2014. She gained her angel wings not long after birth & will always be in our heart & memory.

All children are miracles, but this was an even more special project. I hope that Luke will have this box for many years, it will hold some very important memories of when he was born.

I began with a standard box & lid that I bought from a "Junky" shop. I then covered the box completely, cut the cardstock for the belly band and stamped the gorgeous Baby Bear & fussy cut him out.

On each side of the box, the Baby Bear is stamped and cut out, where-as on the top, I raised him up with Dimensionals.
When I completed the box, I actually moved the butterfly to the top of the box, rather than the side...
I think it looked better that way.

I'm so happy that this will be a keep-sake for Luke and his parents. He is such a beautiful boy, already giving so much joy to everyone that meets him.

I hope you continue to stay warm, it's quite cold here in Melbourne, Australia. I cannot wait to feel the warm sun on my face... See you at my next post :)