Showing posts with label 3D.. Show all posts

Tuesday, April 10, 2018

Preparing For OnStage 2018!!

For those of you who dont know, Stampin' Up! organise various events for demonstrators to attend. This weekend, April 8th April, saw 600 of mostly Australian demos gathering at Sydney's incredible Luna Park for OnStage 2018.

The lead up to this is full of excitement, especially because we knew that a new catalogue was being released!! During these events, lots of the demonstrators make swaps to show off their skills when making cards, 3D items or even scrapbooking ideas. It is a fantastic way to show off the products and in turn, the recipient gains many, many ideas of new ways to use possibly that same product.

This year, right up until 2 weeks before OnStage, I wasnt going to make any swaps - I had no idea of what to make or even an idea of what to do....

And then I found a small stash of metal rings that I had purchased about 5 years ago...
So then, 'it was on, like Donkey Kong!!'

I had made this type of ring before, so I wasnt learning anything new - I could get straight into making them quickly...

Initially I cut a heap of scrap cardstock up, 1 cm in width & for as long as the length of cardstock.

I began by burnishing the complete peices, then gluing the two ends together, just to stop it from rolling around and not actually attaching to anything. It needed the glue to hold it together.

Once it began to roll over itself, I just continued the process. If I got to the end of the cardstock peice & wanted to either continue with that colour or begin another one, I glue the next peice from where the other finishes & so on...

Those trusty pegs come in handy when needing to hold the rolls together, but move onto the next one... I keep about 20 pegs on my turntable of tools, for this type of job exactly!!
I tried a little experiment on this design & added a couple of smaller peices of Real Red & Whisper White cardstock to give the feathered effect... What do you think of it?

When the metal base of the ring was adhered to the cardstock, I would leave them to dry overnight. This ensured the glue was completely dry & finger print free!!

Then it was just a case of ensuring good coverage for the top of the rings. I applied the glue liberally & made sure it dripped into any crevaces within the rolled cardstock so that the finish was as good as it could be. Of course, the pegs came into their own again, along with a big sign telling my teens to stay away from the wet items!!
 Here are a couple of the rings, with the acetate box that Id made to hand them out in. I had wanted to make a box that was similar to a jewellery box from a nice jewellery shop, I guess it kinda looked like that, right?
 These are fun to make & you can experiment with colours or even folding techniques... Just ensure you leave them to dry long enought, otherwise you may be handing out your fingerprints, by mistake!!
This gorgous mess if the first 35 or so of my swaps... I thought I was finished until I found another 16 or so rings & began the process again... Alas, I got to make another 7 on top of my original 35 & chose to stop there, or I may have missed my plane to Sydney!!

Ive loved sharing how to make these, with you...
Be sure to show me what you have made using this technique AND return to see more items frm the amazing event that was OnStage 2018... :)

Friday, November 24, 2017

The Melbourne Stitches & Craft Show 2017

This weekend I am lucky enough to be apart of the Stampin' Dream Team at The Stitches & Craft Show.


We are a group of Stampin' Up! demonstrators who have some together for the purpose of the Show where we showcase various  kits. Obviously the kits have been made using various SU! products & include all the pieces to make a complete card or 3D item.

They have all been greatly received & we heard many positive comments about our kits, the display & the way our team worked together! It's always a bonus to know that our customers are happy with us!

During the show, we have a great special available. When you purchase the 27 Blend Markers with the Colour Me Happy card kit from me, (RRP $267.76), you will also receive FREE a packet of Thick Whisper White cardstock & a FREE Momento Inkpad! 


These additional items means you can get colouring quicker, there are so many more opportunities for you to play!!


You will also have $25 to spend on anything in the catalogue - YES anything!!


 I was reminded today, during the show of how lovely the simple act of giving someone something handmade is such a beautiful thing. A gentleman bought a particular kit for his wife, from me, to celebrate their 43rd Wedding Anniversary. He was so happy to have found something to make for her, 'this will finish my gift for her beautifully,' he said proudly.

How wonderful is that act of love? Im all warm 'n fuzzy, I tell ya!

Until next time, keep Stampin'...


Wednesday, May 31, 2017

Happy 5th Birthday Kelly!!

Like any work-place, an acknowledgment of another year of work is always great to have recognised... This is no different for us, friends of Kelly, who is celebrating her 5th year of being a Stampin' Up! demonstrator.

Kelly's commitment to the company, her friendship and of course, the work she creates, is always amazing!!

With that in mind, I have pulled out my laptop, dusted off my sleepy blog & have finally given it some love & care.. there are soooo many reasons to be happy right now, hey?

Some of you may know that there is a new annual catalogue that is being released to the public on June 1 this year & I have chosen to show off one of the stamp sets from this catalogue. (One of the perks to being a SU! demonstrator is that you are lucky enough to have access to pre-released items!!)

So here we go, time to show you my 'Happy' creations...

This photo shows a couple of the images from Crafting Forever, a brand new stamp set!! I think it has soooo many opportunities to be played with, so I seriously stamped over 40 images & lost myself to colouring them in, using the Watercolor Pencils with an Aquapen. How could you get any colours wrong, really???

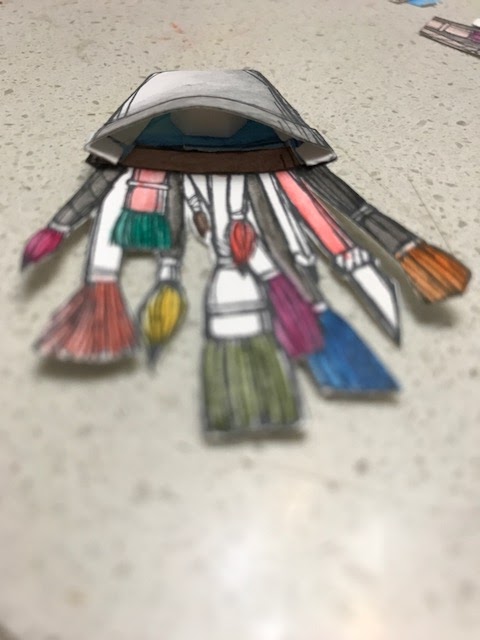
While I was cutting out the paint pots, I realised that I could 'build' a container of brushes by individually cutting them out and layering them, (lucky my children are 12+ and they can cook their own tea, right??)

I decided my paint pots would work really well to hold up the 'easel' part of the an Easel Card. I used acetate, (over-head projector sheets, for us smarter people) behind the paint pots and placed them between the layers of the sentiment band.

The sentiment says: Do something creative every day... Isn't that just a great message to send someone?

I then cut a frame to place over the butterfly, from Butterfly Wings & hung it like a piece of artwork!!

These cards are now travelling all over Australia, as a part of a Demonstrator Swap - I make 10 cards of the same design, they go to a designated person who sorts through all of the swaps & she will send me 10 new swaps, of all different designs - what a great way to be inspired, hey?


How bright and cheerful are they? Perfect timing for Kelly's celebratory party, I think!!
Congratulations Kelly on making a great choice 5 years ago, (I'm celebrating 8 years Sunday, just gone!!) Hip hip hooray to us both!!

http://www.melissagifford.com.au/2017/05/kellys-stamping-friends-blog-hop.html


I'd love to hear what you think about my creations, I'd love for you to leave me a message that you've visited, if you can...

From this blog, you will click onto Danielle's blog, her creations will astound you!!

Take it away Daniella... Thanks for stopping by :)


Friday, February 12, 2016

Bring On The Sweet Stack!!

I have always wanted a centre-peice for my table, for when it is clean... I'm also hoping it would encourage me to keep it that way...?). So I decided to purchase the Sweet Stack Project Kit, (page 152)  This actually the first kit that I have ever bought, crazy hey?

Well, this kit has changed my mind about kits - I loved knowing what to make, following the directions, but also knowing that I could mix it up a little, to make it mine!


So from above, you can see that Ive tried to make the Crushed Curry "icing' the same all the way around the edge of the lower level & I used the Bow Builder punch for a different bow than in the kit. (I can use them for another project!!) The trim on the cake is also different to the kit, it needed a little bit more colour, I thought...


Here is the finished product!! I plan to have each cake peice filled with a small gift for anyone who brings a new guest to my class... Could this be you, perhaps?

Thanks for stopping by to see my latest crafty ideas... I hope to see you again soon, Jo.


Friday, November 6, 2015

Love Is In The Air...

As promised, not so long ago, I am now sharing my latest Card In a Box.

Some of your may know that when I was younger, I was in Foster Care. During this time I was placed with a family that to this day, are very special to me. They became my honory Aunt & Uncle & Cousins. I went to family gatherings with them, celebrated Christmas and birthdays with them & learnt lots of life lessons, just as families do when they spend so much time together. 

I recently received an invitation to celebrate an impending marriage for their eldest boy, so was super excited to  make something so unique for them. Scott and Adriana will be married soon, in Columbia, so we had a great gathering. I got to catch up with so many people from my past, that I remember growing up with... It truly was special!

So here is the Card In a Box that I made for the gorgeous couple that are jet setting soon, to be married in Adriana's hometown, over-seas. 
Using lots of hearts, Real Red, Whisper White & Glimmer Paper mounted on acetate, I came up with this... It clearly goes outside the boundaries of the C6 envelope, so I used the next size up, to keep those hearts safe. 


I wish them so much happiness for their married life & I cant wait to hear about their Wedding and travels.

Thanks for stopping by...

Tuesday, November 3, 2015

Card In a Box have taken over my life!!

Have you heard of the little boxes that are taking over the world, let alone my stamp table?
They are, simply put, a rectangle box that stands either landscape or portrait and have a great display of flowers, butterflies, cupcakes etc, to represent the theme of the card...

On the front is the decoration and the sentiment, while there is a  blank peice of cardstock on the back, for the message...

And as they say: Here is some I have prepared earlier... :P

Ive made this Daffoldil Delight a couple of times now, as a birthday box, Get Well Soon box & a Sympathy box. The set-up lends itself to so many occasions!!

Lots of people like a bit a of sparkle, right? They were the finishing touch to these butterflies, after they were embossed in various folders and squeezed through the big Shot....
One of the best bits of making these, in abundance, is the fact that these little bits n peices use scraps!! And my scraps were building up.... How does that not put a smile on your dial, hey?
I just love how the Glimmer Paper is so shiny in this photo!! I hope it puts a smile on the person receiving it too!!

Now you can see how these Card In a Box have taken over my stamp table, right?

I have left a very special one for my next post, which certainly wont leave you hanging for too much longer, I promise!! The next one I have to show you, is very much made with love!!

See you then...

Wednesday, July 8, 2015

Rest In Peace Janine, We Will Remember You...

Later this week, family & friends of Janine, a fellow Stampin' Up! demonstrator, will be laid to rest.

Our friendship will not be forgotten.

Janine's gentle nature will not be forgotten.

Our late night conversations will not be forgotten.

Janine's talent & attention to detail, in her cards will not be forgotten.

Janine's generosity, especially to Combat Cards, Victoria, will not be forgotten.

Her incredible fight with the insideous disease of breast cancer will not be forgotten.


It is for this reason that I made this wreath for her. Made from 400 rosettes, I have up-cycled old books from the Op-Shop.

It seemed fitting for a fellow paper-crafter...

Sleep well, my friend x

Thursday, April 30, 2015

Stampin' Up! Convention, Queensland 2015 is here!!

Oh my goodness!! I have been so crazy, busy with life that Convention has crept up on me... Suddenly we are in Queensland, on the Eve of the biggest meeting on our Stampin' Up! calendar - The Inspire, Create, Share Convention!!

This event, held for all Australasian Demonstrators allows us to see & use the latest products that are being released, so that we can then inspire you!!!!

During this 3 day meeting, many of the Demonstrators choose to make various cards or 3D items to swap with others, therefore sharing ideas & finally getting to meet those that we have spoken to via various outlets - the family of SU! is amazing with the support we give each other, this is a great way to celebrate it.

And we get to see the new catalogue that will be released in just a few months!!

So with this in mind, here is my swap for others to gain ideas from me - I hope they are happy with my contribution....
(Sorry for the long post, but I want to share everything with you!!)


First of all, I cut a heap of various colours of cardstock into 1 cm thick peices.
I then twirled them around & around & around a very thin sewing needle, just like the quilling technique, until I got it to the size that I wanted.

This is what I ended up with, lots of lolly type shapes!!


I then spent a fair bit of time pouring Crystal Effects onto each side of the cardstock rolls, allowing them to dry overnight before doing the nest step.  
When the top and bottom, (with the ring) was completely dry I then painted around the edges of the cardstock, using a small brush...

This is my new use for the amazing punches available through SU! (Please note, some particular Punches may retire shortly, but we will get a fantastic new catalogue full of new products to explore!)


The next part of my project was to have the rings presented in something, of course! My gorgeous friend & upline, Mel suggested using acetate to make a box to use for them. I decided to make a base for the ring to sit on and then a box to hold ring, the base& the recipe of how I made this altogether.


I am super happy of how this all came together! For someone who was not making any swaps, within 4 days of beginning, they were made! And now all that is left, is to share our love for Stampin' Up! products at tomorrow's Convention - Im almost too excited to sleep!!

Stay here to see more gorgeous work from fellow friends & Demonstrators in the next few posts!!

Happy Stampin'....

Monday, April 6, 2015

My Easter Gift

Wowzers, it's been a while since my last post... Work deadlines, migraines and school holidays have caused all that, sadly...anyway, back to why we are here, right :)

Our  family does small gifts at Easter, so I decided to use one of my many, many Maccona jars for one of them.  My gorgeous neice Rillie loves all things a bit freaky, so this fitted the bill, totally!!

I decorated the jar using retired Designer Paper and the Bow Tie punch, amongst others, coming up with this funky bunny to match the belly band around the jar.


And in all the yumminess of chocolate, I buried these hair ties. a bit cute, hey?
I hope Rillie doesn't think that we are only giving her a jar of chocolate, 'cos these will look great in her stunning hair!!


Saturday, March 21, 2015

I Can Barely Contain Myself!!

I was almost ready to pack up all the items I wanted to take to the market, for a local event.

After I finished the bunnies and they were all on their respective container, I was talking outloud about how the containers needed to be 'up' and visable to everyone walking past the table.

So this is the way that my 10 year old son suggested to display my Easter Bunny containers.

Very ingenious, I think!!
This meant that all the bunny containers were seen by the children and their mum or dad!
Mission accomplished!!

I was so impressed with Darcy's thinking, well done mate!!

Tuesday, March 17, 2015

Getting Ready For Easter!!

I had a local school market for a Primary School on the weekend, so wanted to make sure that I had something for the children to enjoy!
I had seen lots of punch-art on Pinterest or the normal internet sites, but couldn't make them, because the punches that I had, didnt quite work...

So I decided to turn off the laptop and begin to make my own bunny. And this is how this cutie came about!
The new Bow Builder Punch makes this gorgeous little bow, just perfect for this project!

 I tell ya tho, the fishing line whiskers were very trying!! I needed to concentrate to put those under the little bunny nose!!
And the little splash of bling with the rhinestone finished them off!

Once I was happy with one little rabbit, I needed to make more, of course! So then I decided to make 40 of them..

Once each bunny was punched, sponged, glued and completely built, they were placed, front and centre on these containers that I have had laying around for about 3 years!! (Nothing like rushing into using them quickly, hey?)


I am so hoppy, oops, I mean happy with how they have turned out AND it is my design!!

I had so many positive remarks about my bunny containers, it was lovely to hear that they were received so well.

Come back in a couple of days, to see how my 10 year son came up with an ingenious way to display my containers, so that they were seen by everyone...
Thanks for stopping by :)

Monday, March 2, 2015

Shaken, Not Stirred!!

I had a close friend's 40th birthday party a couple of weeks ago. Jason is  a huge 007 Bond fan, so of course, the card needed to reflect this!

I found this card on Pinterest so I followed Sarah-Jane's tutorial on how to make this stunning card, (I wish my house was as clean as my files there!!)


I just love how it turned out and I know that Jason enjoyed it also! 


This is a photo of Jason's cake, I told you he loved Bond!! 
Sue did an amazing job making it for him!


We spent the night dancing to older music than the 'doosh soosh' noise of this decade and had lots of laughs, with those who know Jason & Melissa well.

Happy 40th Jason, thanks for the invite!!