Thursday, November 28, 2019

Parcels & Petals, A Great Card & Wrapping!!

How gorgeous is this bundle?
Buy purchasing this stamp set and matching dies, you will be able to create many delightful cards, tags, bags or wrapping paper!!

And of course, the images will all match - which is exactly what SU! is all about!!

And with most bundles, you receive 10% off when you purchase it together!!
 How cute is this simple card? And you can leave it as it is or step it up and embellish even more with layers, if you like!!

Find this bundle here. Did you know that it can be sent directly to your stamp studio, rather than me delivering it?

How awesome is that!!

Happy shopping!!

Hugs, Jo

Sunday, November 24, 2019

It's a Cut Above The Rest!!

The new  Paper Trimmer from Stampin' Up! is stunning!!

It cuts paper or cardstock right up to the 12 x 12 sheetswith ease & the arm stores away neatly.

 The blade is twice the size of the past one while the scoring blade moves silently & smoothly.
 The markings of CM or Inches run aross the top and bottom of the tool, so can be used easily by left and right handed people.
The space between the main body of the tool & the arm has markings on it so you dont loose your measurement, should it fall into that area.

At $44 each, with each of the blades, they make a great addition to your craft table and is a great Christmas present.

Be sure to purchase yours soon, yes its available now, so as to have it by the time Santa arrives OR you can place this in your Starter Kit, during Saleabration period, (beginning Jan 3), along with other goodies!!

Talk again soon, happy crafting!!

Friday, November 22, 2019

Let's Swap Inspiration!!

During a Stampin' Up! event, one of the best things to do is to swap!!

We can swap cards or 3D items and the buzz is incredible when it happens!!

It's always lovely to introduce yourself while swapping - I just love when I make a connection with who I am swapping, to be someone that I have either followed or even chatted with on-line!

And the ideas, colour combinations & inspiration is so incredible!! Check out a few of these cards!


Margi's card uses 2 pieces of DSP, which we dont see very often & I LOVE IT!!
The Daisy Lane bundle, Butterfly Gala & Stamping Your Way To The Top work so well together.

The Pressed Petal DS & coloured vellum are simply stunning!!


Leonie's card is made just in time for this Christmas! And it is so clean & fresh!! Co-ordinating the Christmas Gleaming & Tidings All Around stamp sets with Sahara Sand & Cherry Cobbler cardstock is a great combination!!

I love it all!!


Monica's card has so many parts to it but it absolutely works!!

She has used the Perenial Essence DSP with Whisper White cardstock & given it height by using the Rectangle Stitched Dies & lifting them up on Dimensionals. Sponging the petals of the punched Perennial Flower gives it depth & makes it a focal point - just beautiful!

This card really does make me smile!!

If any of these cards make you want to create, contact me or my page, to order your own supplies.

Stay close, I'll share more swaps that I have received. They wont disappoint!!


Card 1:
Stamps: Daisy Lane, Butterfly Gala
Cardstock: Whisper White & Think Whisper White, Perennial Essence Vellum
DSP: Pressed Petals DSP
Ink: Merry Merlot, Mossy meadow, Soft Suede
Accessories:  Daisy Punch, Linen Thread, Shimmery Crystal Effect, Perennial Essence Floral Centres, Tear n Tape.

Card 2:
Stamps: Christmas Gleaming, Tiddings All Around
Cardstock: Whisper White, Sahara Sand, Cherry Cobbler
Ink: Sahara Sand, Cherry Cobbler
Big Shot items: Well Written
Accessories:   Linen Thread


Card 3:
Stamps: Tasteful Textures
Cardstock: Thick Whisper White, Whisper White, Daffodil Delight
DSP: Perennial Essence
Ink: Rich Razzleberry
Big Shot items: Tasteful Backgrounds, Rectangle Stiched
Punches: Perennial Flower, Leaf, 1/2' circle
Accessories: Perennial Essence Flower Centres, Dimensional, Tom Bow Glue

Socials:   https://linktr.ee/JoWeedonMelbourne

Wednesday, November 20, 2019

OnStage 2019 Was INCREDIBLE!!

And in a flash it is all over!!

Susan & I started our huge weekend on Friday night, (in Melbourne), at the U2, Joshua Tree concert, slept for a few hours & then jet-setted to Sydney for the Stampin' Up! event, that is OnStage!!


OnStage was wonderful, magical, inspirational & enotional - all rolled into one weekend!!

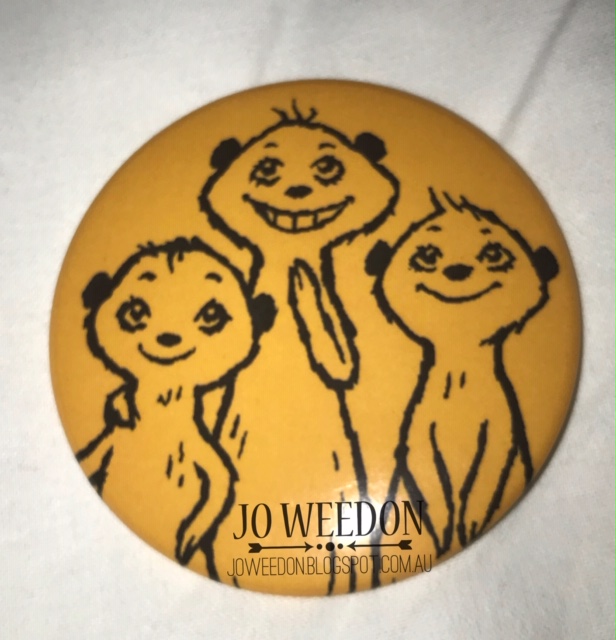
And as an extra surprise, I wont these guys - a trio of meerkats from a soon to be released stamp set - BUT they gave me the prize of receiving all of the prize patrols during the whole day!!

That meant 7 stamp sets and a packet of DSP, (photos of them can be seen here!!!)

At the demonstrator only events, we get to celebrate achievements throughout the year that has been. This year saw me pass my 10th year anniversary, so I was able to walk across the huge stage, for doing so!!
It's funny how something so simple, in front of your peers & all those that you admire, gives you such a lift!!

Here I am taking a selfi with Kylie Bertucci Nicole Golding, who were also celbrating their 10 years as a Demo.


So apart from the new products that we get to see earlier than our customers, (which I can't share with you just yet...), I can share these photos of the day!


And I can tell you how exciting Salebration time will be next year, (Jan - March, 2020).
There are so many gorgeous incentives for you to sign up as a demonstrator - if you have been sitting on the fence about it, then lean over, send me a message on the way over to the crafty side & I can help you to do so! :)

And of course, there is always the friendships! These women, Ellen and Wendy have been a huge support, source of inspiration and giggles for all of my ten years & I am incredibly grateful for them!!

I hav emore photos from other friends, that I will need to steal from their phones or cameras, as I didnt use mine very much...

Im looking forward to sharing more with you soon....


But for now,...I sleep zzzzzz


Friday, November 15, 2019

Everybody is Somebody.

I work in a neighbourhood house & we all work incredibly hard, given the clientele & their various needs.

While we are all an amazing team, we wouldn't be able to do as well as we can without the assistance of many volunteers.

So each year our workplace puts on a dinner, cooked in-house, for all the volunteers throughout the year that have helped us. They may have folded flyers for the courses we offer for mailing out, may have helped with translating during conversations with newly arrived refugees or directly assisted our English teachers in the classroom.

What ever they have helped our services, they are being recognised during this dinner.


There has to be a selfie during such a wonderful gathering, right? Here are some of our volunteers, staff & me!!

This occasion calls for a card that will convey our gratitude to each & everyone on our volunteres.


This card has a single layer of Whisper White & uses a couple of colours for the garden image.

This stamp set, stunning, isn't it!! It is 'Inspiring Iris' and has such a gorgeous image using 2-step stamping to produce the image you see.

The flower buds & stems have an out-line image and then the block of colour to finish. I simply used the D block directly onto the ink pad, stamped off onto scrap paper & then onto the base of the card. (This is known as 2nd generation stamping).

And that verse!!

'You are somebody
who makes everybody
feel like somebody'

It's just perfect for our Earth Angels that are our volunteers! Manjit, our Volunteer Co-Ordinator, (in orange, in the above group photo), wrote a personal message in each of the 36 cards, too!!

And of course, the envelope NEEDS to be decorated also. These were placed at each person's table setting with a small gift from the staff at Glenroy Neighbourhood Leaning Centre.
 Maurie is one of our volunteers, who having been out of action for a while, is back with us - we are so glad!!

Gabrielle is a wonderful co-worker, I value our friendship so much.


I'd love to hear what you think of them, feel free to leave a comment...
Thanks again, Jo.

Stamps: Inspiring Iris
Cardstock: Whisper White
Ink: Mint Macaron, Calypso Coral of Flirty Flamingo

Socials:   https://linktr.ee/JoWeedonMelbourne

Tuesday, November 12, 2019

Kylies blog hop November


This month I have decided to take part in Kylie Bertucci's Blog Hop. I'm super excited that you are here!!

You may have come to my blog through someone else or you may start here, either way, you can click on the names at the bottom of my post & this will take you to the next persons blog & their amazing project!!

In this (long) Blog Post, I've decided to show you another way to use our stunning Designer Papers, (DSP) in my post.

I just love how versatile the products are, to so many varied projects!! I'm showing off the bright & bubbly 'See A Silhouette' DSP.

I've always loved 3D items & this type of MDF craftwood allows itself to be decorated so easily.


Checking out all the edges of the MDF, I ensured there are no rough edges or broken parts to the item.


I then painted all of edges that will be exposed when it is finished. I went with white due the classic finish & it is one of the colours in the DSP that Im using.

The biggest frustration with this is to wait for the paint to dry!!

 A work in progress!

 I almost always give the edges 2 coats, but today I did 3, it simply gives a better finish. The top piece has only 2 coats & I could still see the colour of the wood through the paint.


I always make sure that any dribbles of the paint are either rubbed , or wiped away with a slightly damp cloth so that they are flat. If they aren't, then the DSP wont lay flat on the wood - the buckled look doesn't work for me!!!

Once the paint is completely dry & I mean completely, I turn it over and run the Tear 'n Tape all over the piece of wood. Including the small space.

I chose which design I wanted for each piece, keeping in mind that (1) it needs to be the correct way up when standing, (if there is a top & bottom to the DSP & (2) it shows off the correct side of DSP that I want!


Using a sharp craft I began to cut the shape of each peice, ensuring the DSP is facing the in-correct way when I do so. I want the correct side to be showing when I adhere it later.

I also made sure that I laid the wood down the correct way, some pieces are mirror images, therefore if I place them down the same, it wont fit together later.

You can choose to make a template of your pieces first, but I'm happy to cut directly around the wood, being very careful to not slip & cut the wrong part of the sheet of DSP.

This is where I have to concerntrate, so the design I want to see is the correct way up when adhered, too!! (Please cross your fingers for me!!)

(insert photo)

Don't run your DSP into the areas where another piece will go into the grooves, they are made precisely to fit into  the holes so won't allow for DSP or cardstock.


Where there are holes in the design, (good ones, right!!), I cut them out carefully & slowly.

Once I had completed this part, I was able to start building my little shelf.


Ta-dah!! This took about 2 2/1 hours to complete, not including drying time - what a lovely Sunday afternoon task!


It's creative, enjoyable & functional!!

Thanks for stopping by, Im so happy to have been apart of Kylie's blog hop!!


Cardstock: See A Silhouette Designer Paper
Accessories: Craft knife, Tear 'n Tape', MDF product of choice
Socials: https://linktr.ee/JoWeedonMelbourne

Saturday, November 9, 2019

Weddings Are Wonderful!!

On Monday, Brett & I were guests at long time family friends' son's wedding.

Gosh it was beautiful!! It was held in a large warehouse that caters for many functions.

They met 8 years ago & we have seen their love grow throughout their years together.

So this called for a special Wedding card, of course.

I teamed Beauty Abounds with Painted Glass, all Copper Embossed & used the Cross Of Hope dies.

I just love how a single layered card can still 'pop!!"


Here they are, almost married!!

Just beautiful! We are so grateful to have been at their wedding and we wish them all the happiness throughout their lives...

Thanks for reading, Jo.
Stamps: Painted Glass & Beauty Abounds
Cardstock:  Very Vanilla & Copper Foil Sheets.
Ink: Versamark
Big Shot items: Nested Labels Dies, Cross Of Hope Dies, Big Shot & Plates.
Accessories:    Copper Embossing Powder, Embossing Buddy, Stampin' Dimensionals, , Tear n Tape adhesive, Stampin' blocks.

Socials:   https://linktr.ee/JoWeedonMelbourne

Wednesday, November 6, 2019

I Can Teach You How To....

If you live in the surrounding suburbs of Sydenham/Hillside, the North Western suburbs of Melbourne, then you are able to come to my in house classes!!

Or if you are willing to travel, perhaps?


My next public class in my Stamp Room is on Monday November 11, at 7 pm.

Details can be found here: https://joweedon.stampinup.net/

Bring a friend, I'd love to see you all here !!

Monday, November 4, 2019

Organising My Pairs!!

I posted this on my JoWeedonMelbourne facebook page and thought I need to share it with you here, also!!

love my ear-rings & I have such a wide range of colours & styles of them!!

I love the idea of working out which ones to wear & they will often determine the outfit that I will wear... Do you do this too?

So of course, I needed a way to have all those lovely ear-rings on display & always accessible, right!

 I had seen this idea many years ago & finally got around to finding these kitchen strainers & re-purposing them!!
 They sit flat against the wall, I can see all the pairs at the same time, they dont get tangled & I know when an ear-ring is missing ,(dont worry, I found the pair to those gorgeous purple ones!!)
So many of these ear-rings hold special memories of who I was with or what the event was that I bought them at, etc, so Im so glad to have them to cheer me up!!

Come back soon to see what else I am sharing with you :)

Saturday, November 2, 2019

Dressing Up Jars!!

For those of you who know me, I have always collected Maccona jars. It began originally when Brett & I would drink copious amounts of coffee, but now it is only he who drinks it...

But friends of mine still pass on the jars to me, so I always have quite a few around the place!!

Last week Leanne dropped off a large box of Maccona jars at my doorstep & they sat on my desk for most of the week... Until Thursday when I was preparing for my usual Friday night Facebook Live Video!!

And then inspiration struck!!
"Decorate those jars, girlfriend!!"

So I got to measuring the circumference of the jars and got to work!!

You can see my Live Video  here.


Be sure to leave me a comment on the video or here, please. It makes me want to make more items for you to see!!

Thanks, Jo.

Stamps: Stargazing & Merry Christmas To All,
Cardstock:  Night of Navy, Pretty Peacock, Very Vanilla, Copper Foil Sheets.
Ink: Versa Mark,
Big Shot items: Stitched Nested Labels dies, Stitched Stars Dies, Big Shot & plates.
Accessories:   Fine Tip Glue, Stampin' Dimensionals, , Paper Snips, Tear n Tape adhesive, Stampin' blocks, Bone Folder.

Socials:   https://linktr.ee/JoWeedonMelbourne